
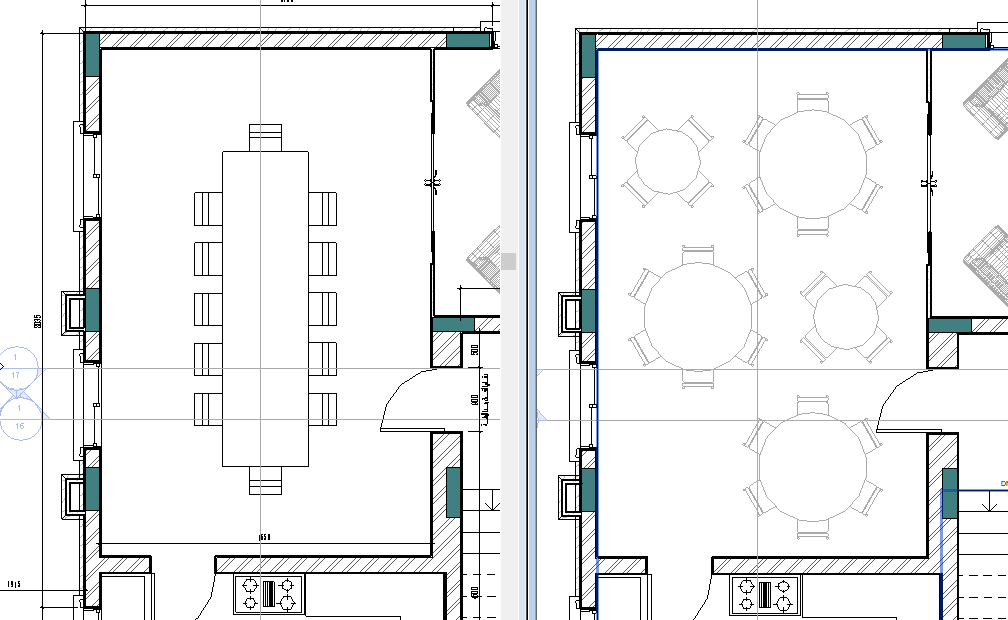
In many cases of design, you come to a point where you need to consider options. What shape should the stair be, which entrance side is better, what is the best furniture layout?
The best answer to this issue, is creating design options in Revit. This feature lets you keep using the same file, explore different layouts, create different views to share with others, and ,at the end, approve the best option when you want to.
The best answer to this issue, is creating design options in Revit. This feature lets you keep using the same file, explore different layouts, create different views to share with others, and ,at the end, approve the best option when you want to.
Setting-up a design option set
Begin by doing the following:
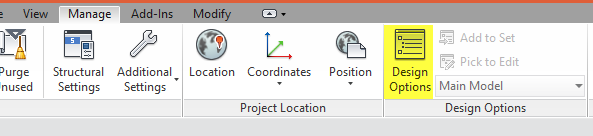
- Go to Manage Tab, Design Options Panel, Manage Design Options
- Click New Option set, and rename it as needed
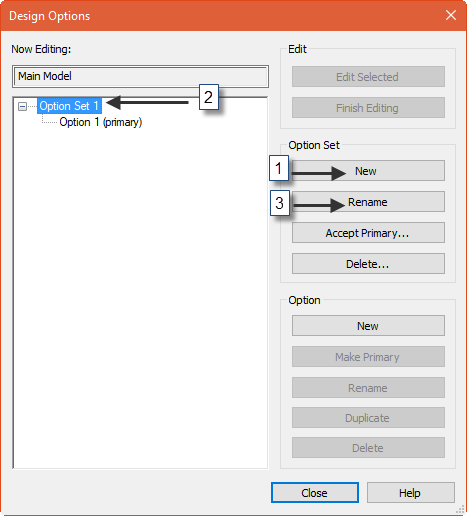
- Create the number of required options and name it properly
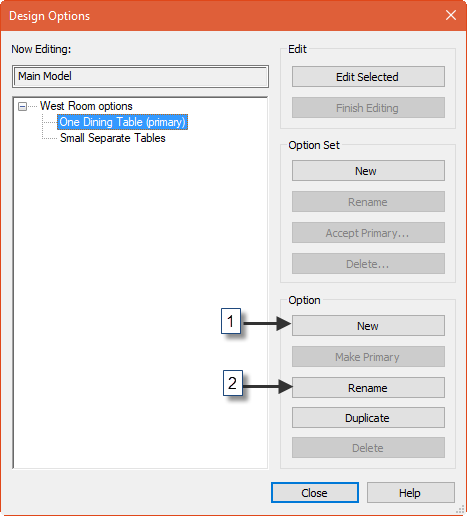
Once you're done with the above steps, click Close.
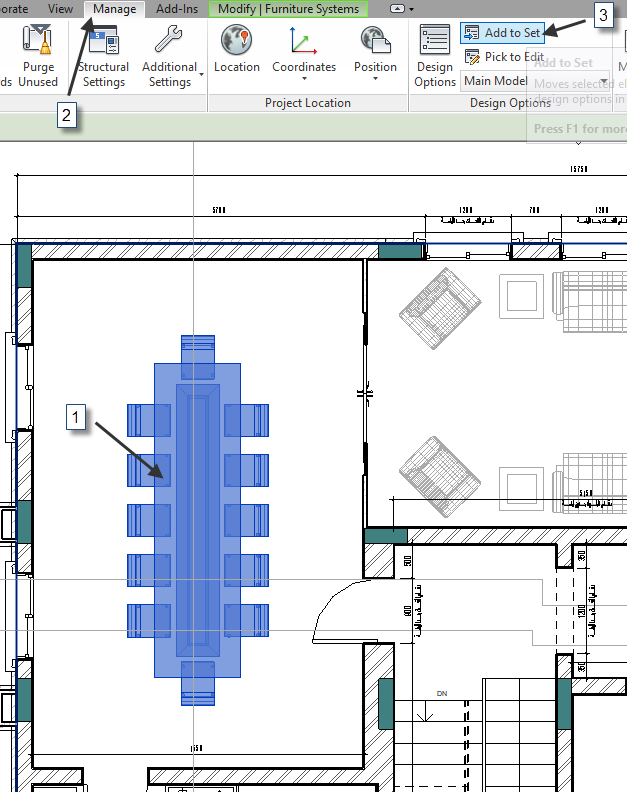
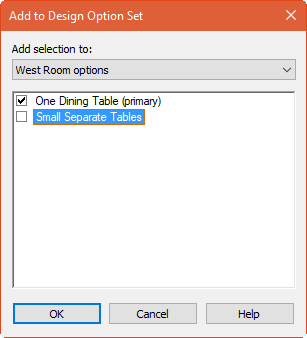
Now, select the model elements that will be affected by the desired design options, Choose add to option set from the ribbon menu as indicated below, mark the options where you want to keep these elements on and click OK.
Now, select the model elements that will be affected by the desired design options, Choose add to option set from the ribbon menu as indicated below, mark the options where you want to keep these elements on and click OK.
You're now ready to change your model elements by selecting the desired option from the lower right tab. Once you're done, you can switch back to 'Main Model' for printing your changes.

On the next week's TIP, I will show you how to create separate views and sheets to print both options and what you should do when you want to accept one option and discard the others. Share this free tutorial with the community, and don't forget to comment below if you have any questions.


 RSS Feed