What are view filters?
View filters enable smart selection of Revit elements based on specified criteria, like selecting all visible structural columns of a specific size, or selecting all walls of 1hr fire rating. After creating the required filter, you may override elements graphics as needed to emphasis required information in project views.
How to create view filters?
Step 1: Go to view tab, Graphics, click Filters
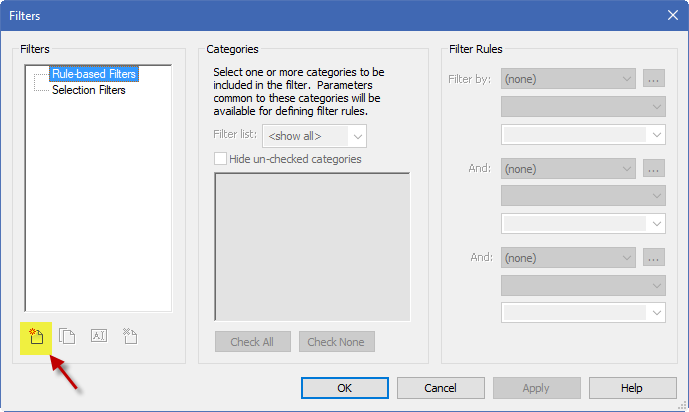
Step 2: Click on New to create a new filter
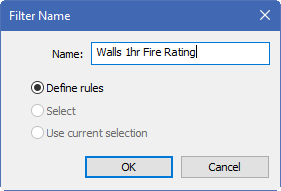
Step 3: Give your filter a unique name, in this case (Walls 1hr Fire Rating), then click OK
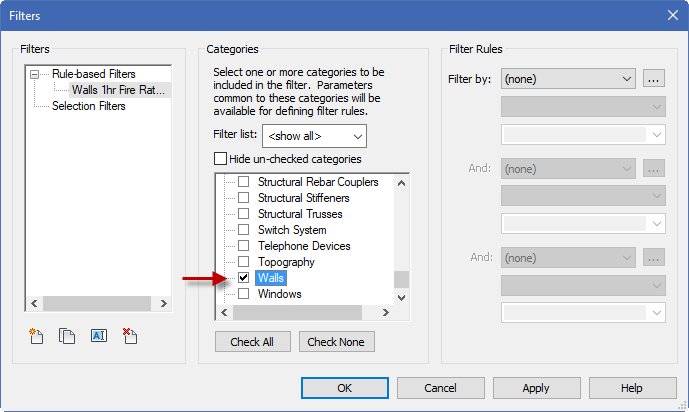
Step 4: On the 'Categories' section, select Walls
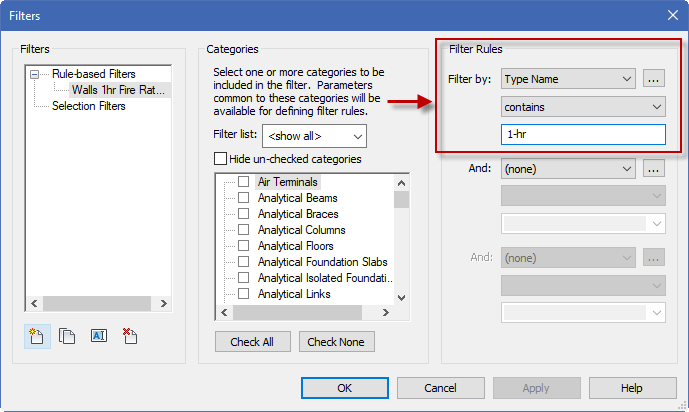
Step 5: Under 'Filter Rules', Select Filter by: Type name. Select 'Contains' below & type (1-hr)
Step 6: Click OK to confirm, your filter is now ready to be used in project views.
How to apply view filters?
Now that you have your filter ready, let's put it to action!
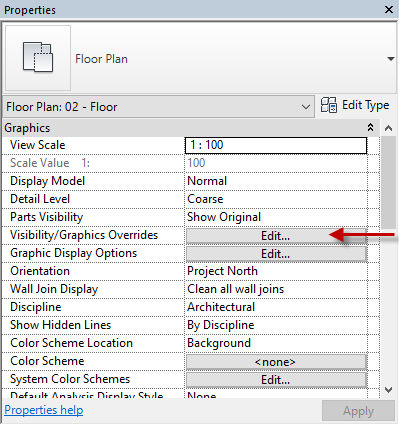
Step 1: Open the Visibility/Graphics Override window (Shortcut: VV or VG)
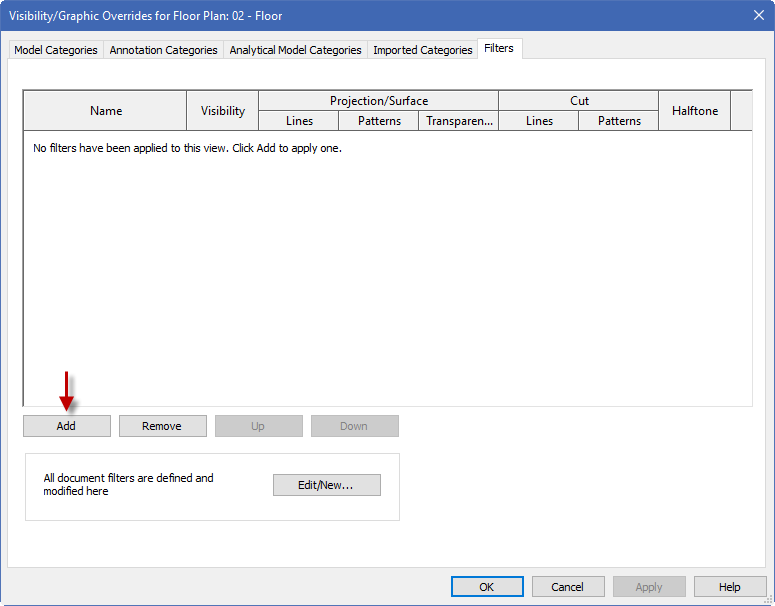
Step 2: Switch to Filters tab & click Add
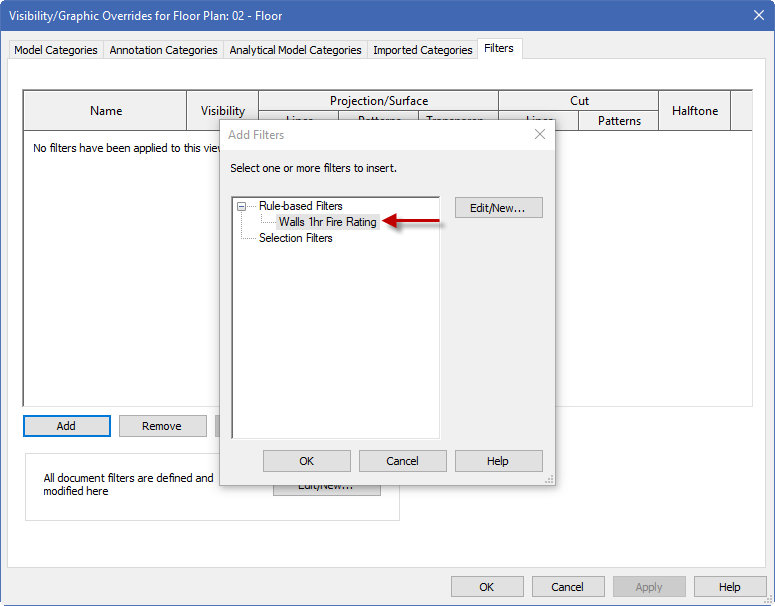
Step 3: Select the filter/s you want to add to the current view or view template
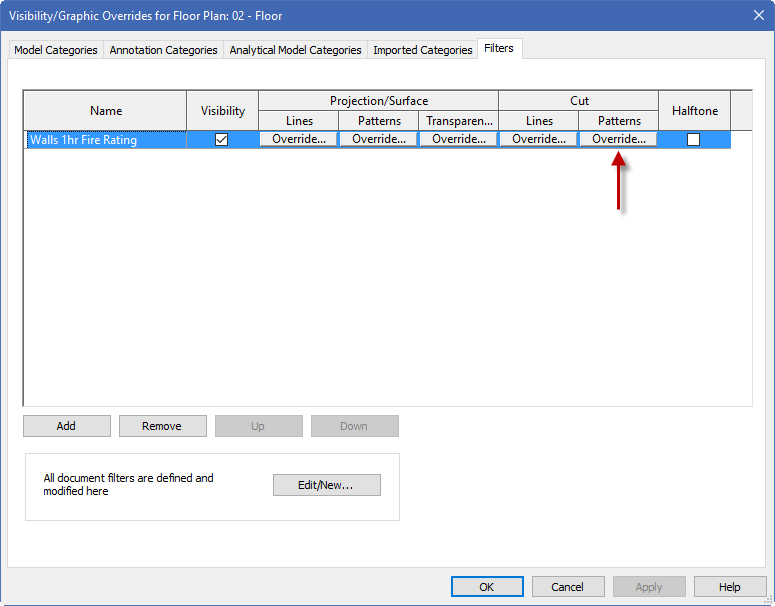
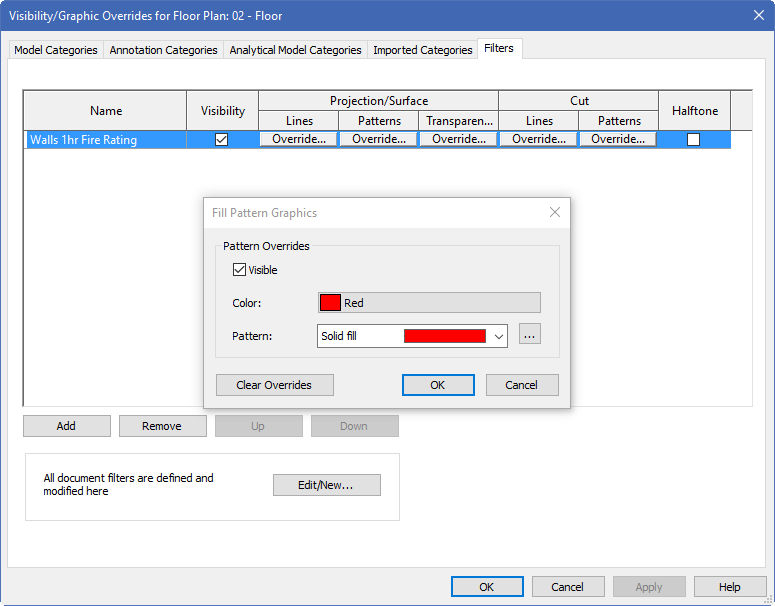
Step 4: Click 'Override Patterns' under 'Cut' column
Step 5: Select the desired pattern and color to identify 1-hr fire rated walls
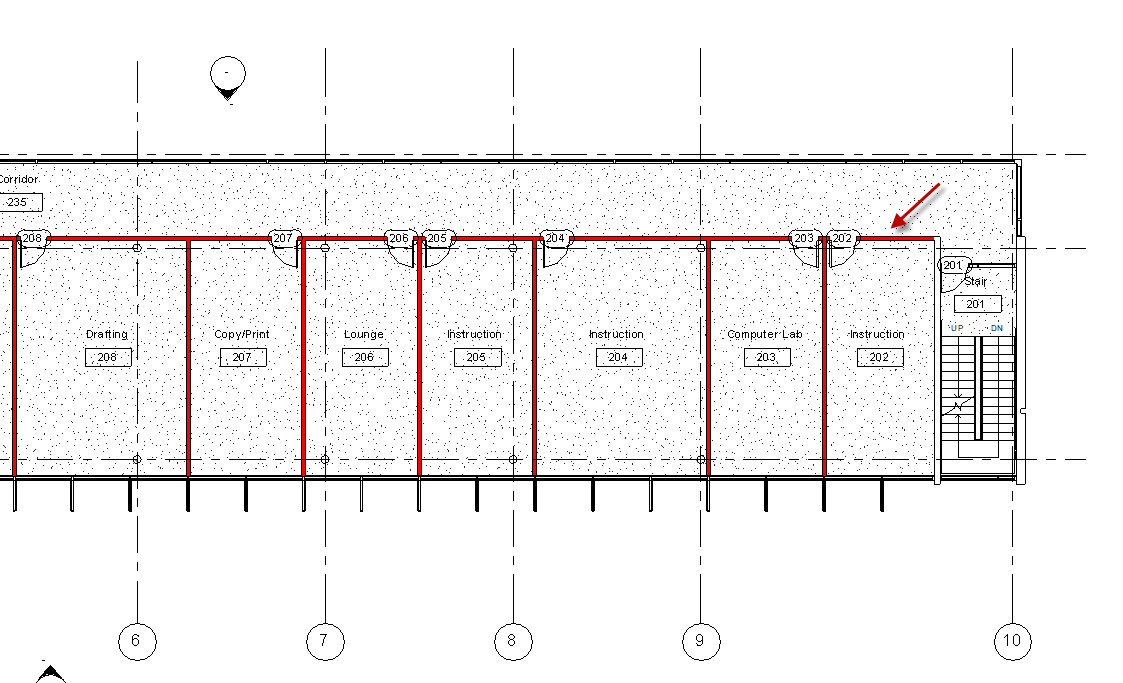
Click OK to apply the filter to your selected view.
- The same previous steps may be applied to any of Revit elements, not only walls.
- You may apply several view filters to a single view in Revit
- View filters are best used with view templates to increase productivity & reduce rework.




 RSS Feed