
This is a free Tutorial provided by Revit Courses.
Level: Beginner
Duration to complete: 5 mins
Prerequisite: Autodesk Revit 2011 or later Installation (I'm using Revit 2017 for this tutorial)
... So, you've the software installed & ready to start your first project! But what is the proper way to start? In this short tutorial you'll get to know what you need to do that through the best possible approach.
Step 1 - Create a new project
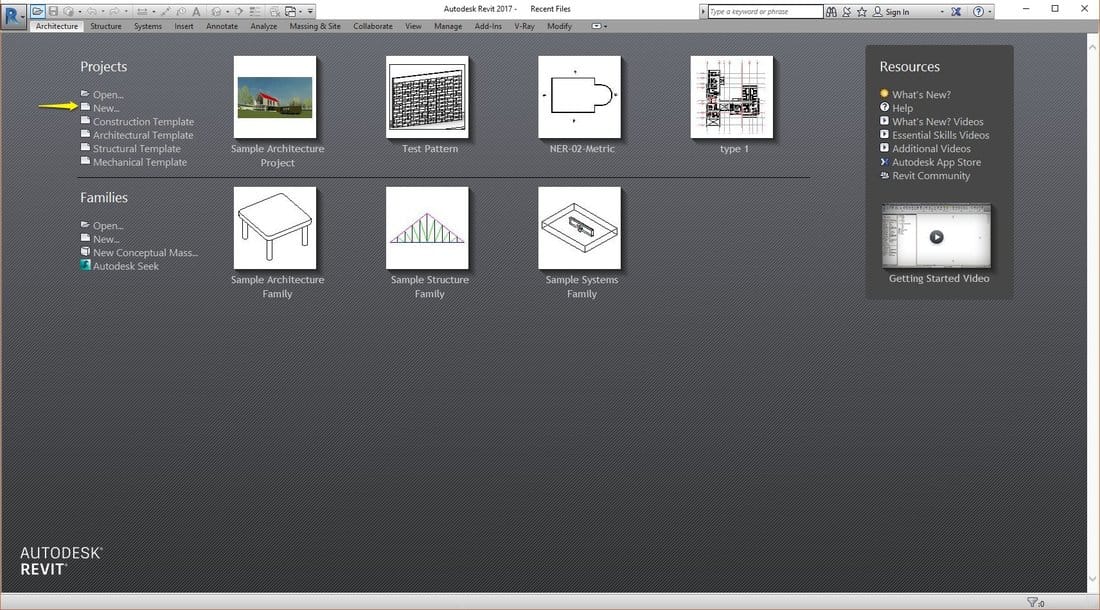
After opening Revit, you'll see the 'recent files' screen. You can use available tools here to open previous projects / families or create new ones. Start by pressing 'New' under 'Projects'
Level: Beginner
Duration to complete: 5 mins
Prerequisite: Autodesk Revit 2011 or later Installation (I'm using Revit 2017 for this tutorial)
... So, you've the software installed & ready to start your first project! But what is the proper way to start? In this short tutorial you'll get to know what you need to do that through the best possible approach.
Step 1 - Create a new project
After opening Revit, you'll see the 'recent files' screen. You can use available tools here to open previous projects / families or create new ones. Start by pressing 'New' under 'Projects'
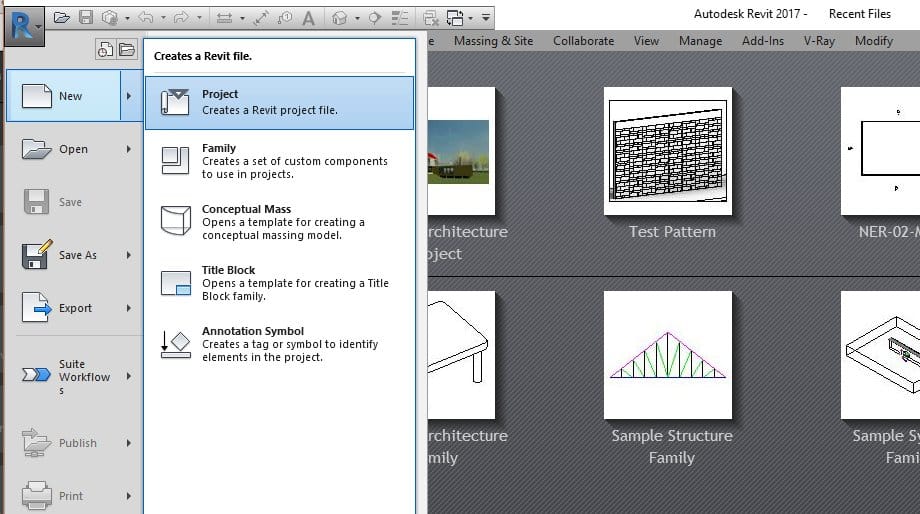
Alternatively, you can press Revit menu button at the top left corner & select New > Project
Once you click 'New', you'll be prompted to select starting template. Select a template from the drop-down menu, make sure you're creating a new 'Project', not 'Project Template', then click 'OK'.
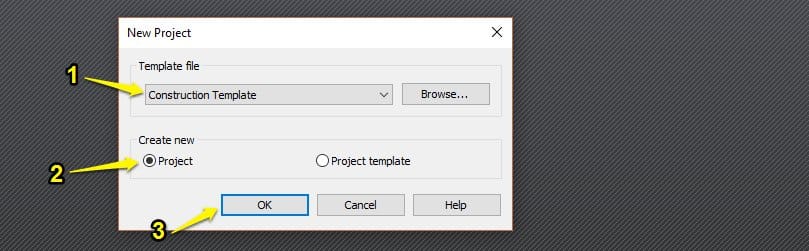
Note: If you can't see any templates in the 'Template file' box, you can download architectural template here.
| Step 2 - Adjusting Project Levels The first thing you should do right after starting your new project, is to adjust level count & height. If you started your project using the 'Architectural Template', you'll see only 2 levels in the 'Project Browser' panel. To start adding more levels, you need to switch to a section or elevation view. Double click the 'South' elevation to open. | 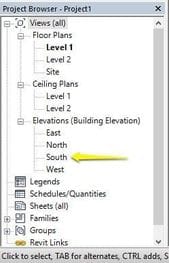 |
Once you've opened the elevation, you'll see 'Level 1' & 'Level 2'. Click the level you want to edit, then click again on its value. All measurements are in mm if you're using the 'Metric Template' & it is measured from 'Project Base Point'.
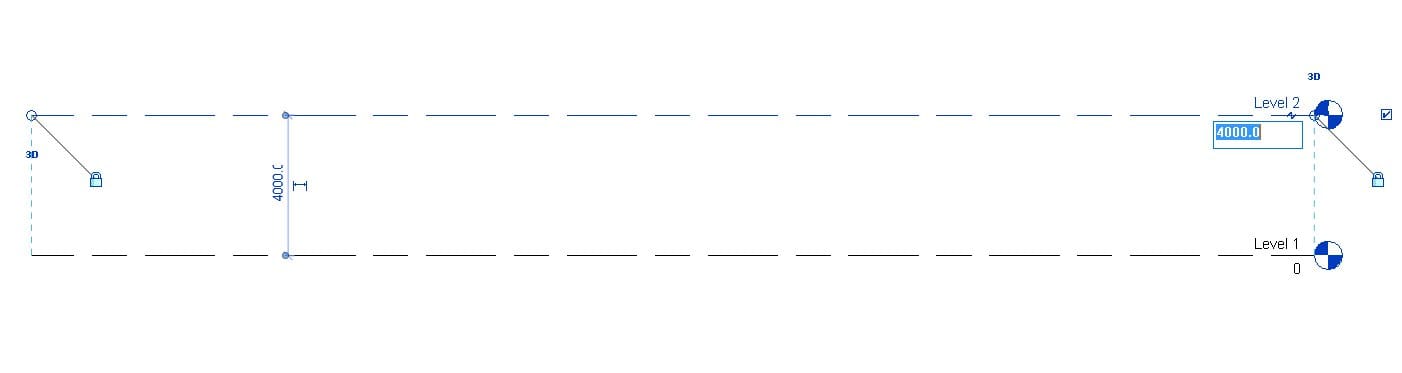
Note: You can also click Level name to change as needed. Some architects prefer naming levels (Site Level, Ground Floor Level or G.F. lvl ... etc.)
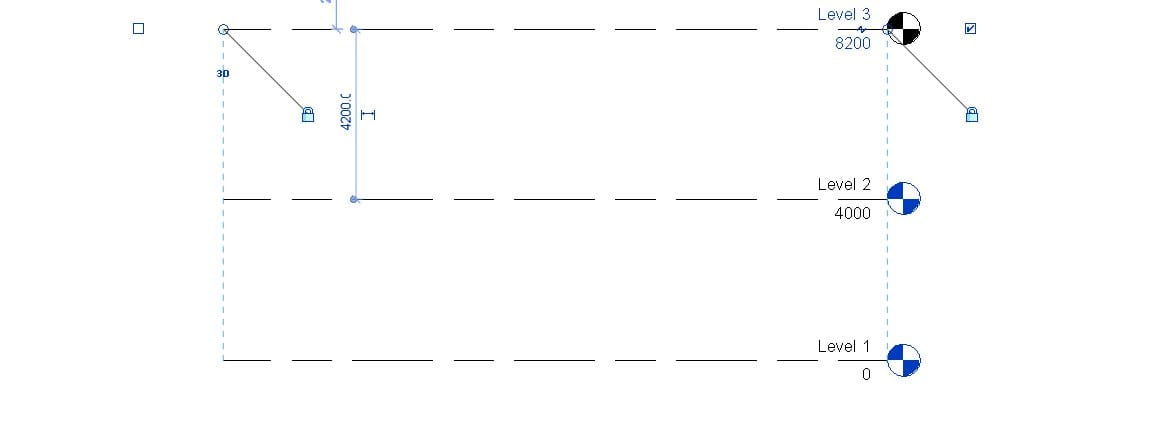
| To add more levels; go to Architecture tab > Datum Panel > Level (Shortcut: LL). Move your cursor right above the left end of Level 2 until you see a blue dashed line. Type in required height difference & press ENTER. Move your cursor to the right end until you see a similar dashed line. Click to finish creating the new level. Rename if required. | 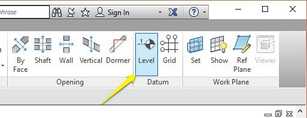 |
Continue creating more levels as needed. You may use Array tool to create several levels quickly.
You're now ready to start working on your new architectural design project. Next, I will show you how to create Property Line, Datum Grids & basic building elements. Let me know if you're facing any proplems starting your project. Email me or leave a comment below.
info@revit-courses.com
You're now ready to start working on your new architectural design project. Next, I will show you how to create Property Line, Datum Grids & basic building elements. Let me know if you're facing any proplems starting your project. Email me or leave a comment below.
info@revit-courses.com


 RSS Feed